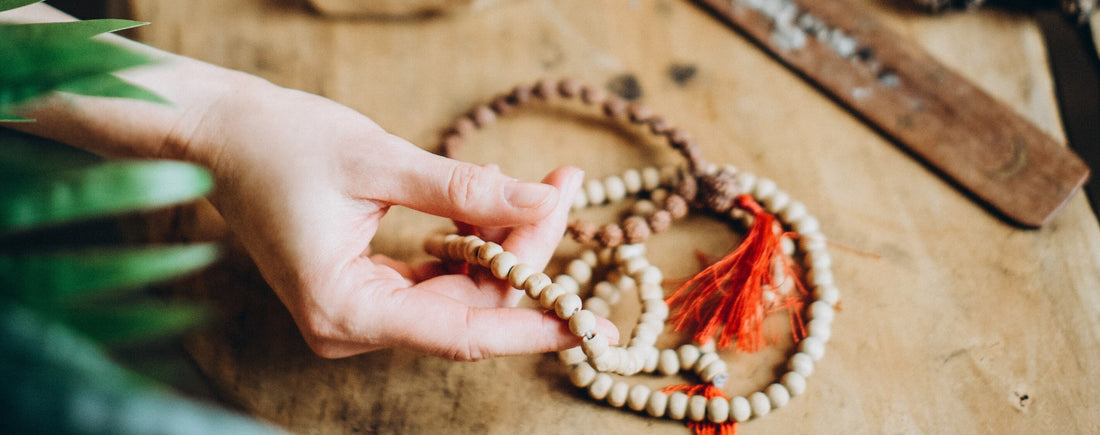
Malas can be a great addition to your meditation practice. If you’re looking for a DIY guide on how to create your own mala necklace or bracelet, look no further.
The mala is an ancient spiritual tool that’s been used for thousands of years to help keep accurate count of mantras during a meditation. The mala is made up of gemstones or beads that become infused with the energy that’s channeled into them through a mantra repetition. By creating a special mala necklace or bracelet worn directly on the skin, you can keep the energetic properties of the beads close to you. In fact, mala jewelry has become a physical symbol of spirituality worn proudly around the necks and wrists of spiritual devotees. Malas can take on even more of a special meaning when you make them for yourself or as the perfect handmade gift for someone else.
Traditionally, a mala has 108 beads, but you can use factors of 108, such as 18, 27, 36, or 54, to make a shorter mala that can be worn as a bracelet. (Necklace malas are typically used for longer mantra repetitions.)
Also with tradition, sandalwood, rudraksha, or tulsi beads are used in malas; however, any gemstone that has the energetic properties you’d like to enhance (i.e., rose quartz to enhance love energy) is highly encouraged.
Guru Bead
The guru bead is the bead that the tassel will attach directly to. The guru bead symbolizes the student-guru relationship and is to be respected. When using a mala for mantra repetition, you will never skip over the guru bead.
Tassel
The tassel is the cluster of string at the bottom of the mala. Each strand of the tassel is an extension of the cords that bind the necklace together and our connection to the divine and one another.
Overhand Knotting
A true sign of a traditionally crafted mala is a simple hand knot in between each bead. Overhand knotting not only makes the mala stronger but also provides the perfect amount of space between beads.
1-materials.jpg
Before you begin crafting your mala, make sure you have the following supplies ready:
2-2.jpg
Step 1: Cut a length of cord (5 feet for a 108-bead mala necklace is suggested).
Tip: Use clear nail polish or glue to coat a few inches of one end of cord, let it dry, and then cut it to a pointed tip. This will make stringing the beads much easier!
2-tip.jpg
Step 2: Tie off one end of your cord and leave a 5-to-8-inch tail. This “tail” will be used to tie on the tassel.
3-2.jpg
Step 3: Start stringing your beads and pull a tight knot after each bead using your thumbnail to push the knot tight against the bead. Traditionally, no tool is used to make the knots.
4-1.jpg
Step 4: Continue this repetition for 108 more times. Notice how malas are as meditative to make as they are to use!
Tip: Start infusing your beads with energy right away by saying a silent mantra, prayer, or intention with each bead you string.
5-1.jpg
Step 5: When you have finished stringing all your beads, using a simple knot, tie the two ends of string together to create a full circle.
6-0.jpg
Step 6: String your guru bead, which is larger and has a larger hole, onto both pieces of string at the bottom of the mala. Tie another simple knot secure the guru bead.
7-0.jpg
Step 7: Attach and secure your tassel by stringing one end of the cord through the loop at the top of the tassel and the other end of the cord through the loop on the top going the opposite direction. Tie and secure multiple times.
Tip: Use the clear nail polish or glue to coat these knots so they stay secure.
8.jpg
The mala is an ancient spiritual tool that’s been used for thousands of years to help keep accurate count of mantras during a meditation. The mala is made up of gemstones or beads that become infused with the energy that’s channeled into them through a mantra repetition. By creating a special mala necklace or bracelet worn directly on the skin, you can keep the energetic properties of the beads close to you. In fact, mala jewelry has become a physical symbol of spirituality worn proudly around the necks and wrists of spiritual devotees. Malas can take on even more of a special meaning when you make them for yourself or as the perfect handmade gift for someone else.
The Anatomy of a Mala
BeadsTraditionally, a mala has 108 beads, but you can use factors of 108, such as 18, 27, 36, or 54, to make a shorter mala that can be worn as a bracelet. (Necklace malas are typically used for longer mantra repetitions.)
Also with tradition, sandalwood, rudraksha, or tulsi beads are used in malas; however, any gemstone that has the energetic properties you’d like to enhance (i.e., rose quartz to enhance love energy) is highly encouraged.
Guru Bead
The guru bead is the bead that the tassel will attach directly to. The guru bead symbolizes the student-guru relationship and is to be respected. When using a mala for mantra repetition, you will never skip over the guru bead.
Tassel
The tassel is the cluster of string at the bottom of the mala. Each strand of the tassel is an extension of the cords that bind the necklace together and our connection to the divine and one another.
Overhand Knotting
A true sign of a traditionally crafted mala is a simple hand knot in between each bead. Overhand knotting not only makes the mala stronger but also provides the perfect amount of space between beads.
Supplies for Creating Malas
Before you begin crafting your mala, make sure you have the following supplies ready:
- 108 beads in 6 mm or 8 mm size
- Use a bead with a hole size of 0.8 to 1 mm
- 5 feet of 1 mm waxed cotton or hemp cord
- For shorter malas, use a shorter amount of cord
- Waxed cotton or hemp will ensure a strong and durable mala
- 1 guru bead
- A guru bead can be a large bead, charm, or anything with a hole large enough so that two pieces of your cord can fit through successfully
- 1 tassel
- Be creative with your tassel; it can be made of a variety of different materials including silk, cotton, horse hair, or even leather
- Scissors
- Nail polish or glue to coat the ends of the string
Steps to Creating a Mala
Step 1: Cut a length of cord (5 feet for a 108-bead mala necklace is suggested).
Tip: Use clear nail polish or glue to coat a few inches of one end of cord, let it dry, and then cut it to a pointed tip. This will make stringing the beads much easier!
Step 2: Tie off one end of your cord and leave a 5-to-8-inch tail. This “tail” will be used to tie on the tassel.
Step 3: Start stringing your beads and pull a tight knot after each bead using your thumbnail to push the knot tight against the bead. Traditionally, no tool is used to make the knots.
Step 4: Continue this repetition for 108 more times. Notice how malas are as meditative to make as they are to use!
Tip: Start infusing your beads with energy right away by saying a silent mantra, prayer, or intention with each bead you string.
Step 5: When you have finished stringing all your beads, using a simple knot, tie the two ends of string together to create a full circle.
Step 6: String your guru bead, which is larger and has a larger hole, onto both pieces of string at the bottom of the mala. Tie another simple knot secure the guru bead.
Step 7: Attach and secure your tassel by stringing one end of the cord through the loop at the top of the tassel and the other end of the cord through the loop on the top going the opposite direction. Tie and secure multiple times.
Tip: Use the clear nail polish or glue to coat these knots so they stay secure.

