This is the second part of a special two-part series on Ayurvedic approaches to treating osteoarthritis. In Part I, Dr. Sheila Patel discussed research showing the benefits of various ayurvedic herbs and meditation in treating this disorder. Read Part I here. In Part II, she looks at how yoga can help people coping with osteoarthritis increase mobility and flexibility, relieve joint stress, and experience greater physical and emotional well-being. She also shares specific poses to improve flexibility and strength in the spine, knees, and other joints.
From a physical perspective, the practice of yoga increases strength, flexibility, and balance, all of which are important for health in general and are particularly vital for those coping with osteoarthritis (OA).
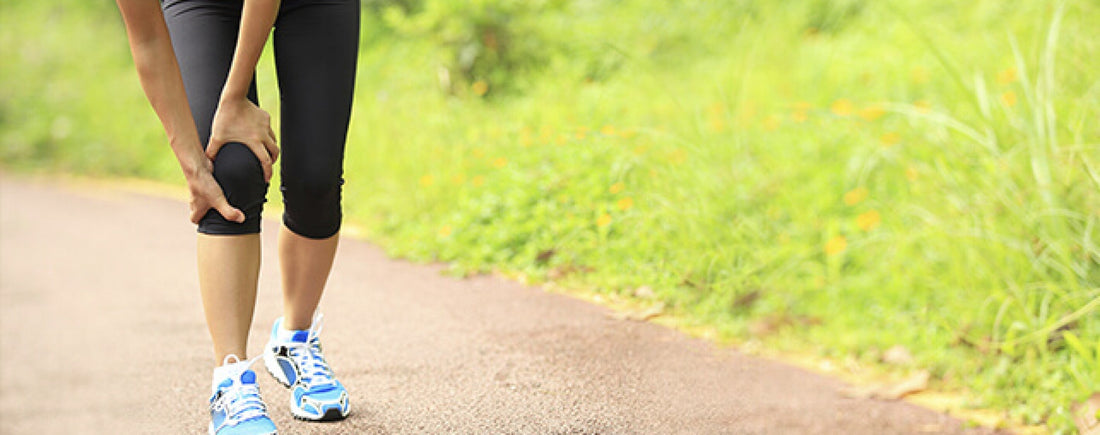
When practiced regularly, gentle yoga movements not only strengthen the muscles that support the joints but also improve the flexibility of the muscles, which is more effective than just strengthening alone. Several studies have shown the benefit of stretching and increasing flexibility for people with OA in the knees. While some exercise programs focus solely on strengthening the quadriceps muscle (an important part of most approaches to knee OA), including yoga stretches builds strength as well as increasing flexibility. One study that focused exclusively on quadriceps strengthening demonstrated that patients actually lost flexibility when they only focused on strength training. This did not occur in programs that included stretching.
People with “loose” or hypermobile joints have a higher risk of developing OA due to uneven wear and tear on the joints. In this case, yoga can be used as a therapy to stabilize hypermobile joints by strengthening the muscles around joints and eliminating the uneven forces on the joint.
In the seated position, extend your legs out in front of you, toes pointed up. Inhale, raising your arms above your head. Now exhale, reaching for your toes, ankles, or calves. Bending your knees if necessary, gently press the crown of your head towards your toes as you breathe deeply. Surrender to the breath.
Begin by lying on your stomach with your thighs parallel to each other. Firm your leg and thigh muscles as you extend your legs so that your toes push away from you towards the wall. As you inhale, place your elbows under your shoulders and your forearms on the floor. Exhale, using your chest muscles and back to lift your torso, without overextending, by pushing off with your hands.
Focus on rolling your outer thighs towards the floor, which lengthens your lower back and prevents it from being overly stressed. Stay in cobra for a few seconds, breathing deeply, and then slowly lower your chest to the floor. You can gradually increase to ten seconds. Turn your head to one side and take a few more breaths, feeling your back release and broaden. Repeat two to seven times.
Stand with your feet about three feet apart, turning your left foot slightly to the right and your right foot out to the right at 90 degrees. Raise your arms and reach them out to the sides, parallel to the floor, with the palms pointing down.
Anchor your left heel to the floor and firm your thighs, rolling your right thigh out. Breathe in, and as you exhale bend your right knee over the right ankle, so that the shin is perpendicular to the floor. Bend as far as is comfortable for you, bringing the right thigh as parallel to the floor as is right for your body. You can place your right hand along your calf or just outside your right foot, depending on your flexibility. You can also rest your right forearm on the top of the right thigh or place a block outside the front foot to support your hand.
Extend your left arm straight up toward the sky, and with a deep inhalation reach your left arm over the back of your left ear, with the palm facing down. Feel the stretch from your left heel through your left fingertips as you extend the entire left side of your body. Keep your gaze on your left hand (unless you have neck injuries) and focus on creating as much length on your right side as you have on the left side.
Hold the post for 10 to 30 seconds and come up on the inhale, pressing both heels into the floor, sweeping your left arm towards the sky. Reverse the position of your feet and repeat the sequence for the left side, holding the pose for the same length of time.
Sit on the floor with your legs out in front of you. Cross your bent left leg over your right thigh, placing your left foot on the floor. Place your right arm on the outside of your left knee and hold your right knee, while twisting your spine to the left. Hold this position, breathing easily. With every exhalation, allow yourself to surrender into the pose.
Return to the midline and repeat the posture on the other side by crossing your right leg over your left thigh, placing your right foot on the floor. Place your left arm on the outside of your right knee and hold your left knee, while twisting your spine to the right. Again, breathe easily into the pose, using your breath to increase your flexibility. As you become more flexible, reach around and grasp the ankle of the foot that is placed on the floor. Hold for ten seconds, then return to center.
Close your eyes for a few moments and put your attention on your spine. Envision the life force flowing up from the base of your spine, through your pelvis, into your abdomen, up through your heart, through your throat, between your eyes, and into your head. Imagine the thousand-petaled lotus flower at your crown chakra opening. Activate the intention to live your life from a more expanded state of awareness as a result of energy flowing freely through your body.
Bring your legs apart so your feet are wider than your shoulders. Raise both arms out to the side up to shoulder height so that they are parallel to the floor, palms turned down. Turn your left foot 90 degrees outward, keeping both hips facing forward. Turn your right foot slightly towards the left foot and keep the hips forward as if you have headlights coming from your hips, shining straight ahead.
Press your hips to the right and place your left hand on your thigh above your knee. Bring your right arm up so it is straight with fingertips toward the sky. Make sure to keep your body level as if you are between two glass window panes.
Hold pose for five or six breaths. Gradually return to an upright position, with your arms extended out to the sides, palms turned down. Pause for a moment. Repeat on the other side.
For most people the eagle pose is challenging on their first attempt; however, this pose can usually be mastered within a short period of time. It is helpful to do eagle arms and eagle legs separately for the first few times.
*When doing full Eagle, do the arms first and then follow instructions for legs.
Stand with your legs three to four feet apart and turn your right foot in slightly to the right, and your left foot 90 degrees to the left. Align your left heel with your right heel. Expand your arms out stretching them parallel to the floor, with your palms facing down.
As you exhale, bend your left knee, bringing your left thigh as parallel to the floor as is comfortable for you. Keep expanding your arms away from your body keeping the torso long and the shoulders centered over your pelvis. Press your outer right heel into the floor and focus on firming the right leg as you bend the left knee. Don’t allow your back to “sway” out; instead, keep the tailbone tilted slightly towards the pelvis. Stay in this position for five deep breaths. Come up on the inhale, reverse your feet, and repeat on the other side.
References
Part II: Treating Osteoarthritis with Yoga Therapy
Yoga is a time-honored science for balanced living and self-realization. By integrating body, mind, and spirit with the practice of yoga, we experience physical, emotional and spiritual benefits. In addition, by bringing our attention to the present moment, we increase our body awareness, not only while practicing yoga, but also in our everyday movements.From a physical perspective, the practice of yoga increases strength, flexibility, and balance, all of which are important for health in general and are particularly vital for those coping with osteoarthritis (OA).
When practiced regularly, gentle yoga movements not only strengthen the muscles that support the joints but also improve the flexibility of the muscles, which is more effective than just strengthening alone. Several studies have shown the benefit of stretching and increasing flexibility for people with OA in the knees. While some exercise programs focus solely on strengthening the quadriceps muscle (an important part of most approaches to knee OA), including yoga stretches builds strength as well as increasing flexibility. One study that focused exclusively on quadriceps strengthening demonstrated that patients actually lost flexibility when they only focused on strength training. This did not occur in programs that included stretching.
Relieving Stress on the Joints
Yoga’s focus on balance and alignment helps improve biomechanical imbalances that create stress on the joints. As researchers have found, the damage to cartilage often occurs because of the unbalanced positions that the body is put in while sitting, walking, and moving. Misalignments of bones, dysfunctional movement patterns, lack of body awareness, and poor posture can all contribute to wear and tear of the cartilage. Yoga can retrain our body to move in ways that decrease stress on our joints.Keep Moving
Another benefit of yoga is that it keeps people moving and reduces the pain and stiffness associated with osteoarthritis. Over time, lack of movement leads to tighter muscles and lack of circulation into the joints themselves. Movement is necessary for proper production of the synovial fluid inside the joints. By moving the joints, the synovial fluid can continuously lubricate and cushion the joints.People with “loose” or hypermobile joints have a higher risk of developing OA due to uneven wear and tear on the joints. In this case, yoga can be used as a therapy to stabilize hypermobile joints by strengthening the muscles around joints and eliminating the uneven forces on the joint.
Yoga Enhances Emotional Wellbeing
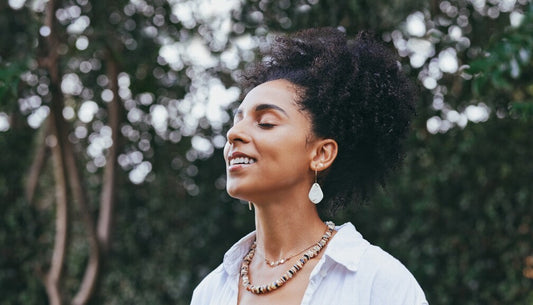
Beyond the physical improvements that yoga can provide, it has the additional benefits of enhancing mental well-being and emotional balance. Yoga is associated with increased energy, fewer bodily aches and pains, and increased mental energy and positive feelings. These are all important factors for anyone dealing with chronic pain conditions such as OA.How to Get Started with Yoga
If you’re using yoga as a therapeutic tool for OA and other conditions, it’s important to work with a certified yoga instructor or therapist to develop a specific program that is appropriate for your individual needs. Here I will offer some general guidance and descriptions of a few poses that target specific areas of the body.- Always listen to your body and never go beyond what is comfortable.
- Yoga is not a competitive sport; every body is different, so don’t compare your yoga practice with anyone else’s.
- Focus on the breath with each pose to connect you to the present moment
- All poses can be modified for safety and comfort.
- Every yoga session should begin and end with several minutes of corpse pose (savasana) and quiet breathing.
Poses for the Spine
In combination, the following poses strengthen and stretch the back in the six natural directions of spinal movement (flexion, extension, lateral bending, and lateral twisting).Seated Forward Fold: Pachimottanasana (pah-she-MOH-tahn-AHS-ahna)
In the seated position, extend your legs out in front of you, toes pointed up. Inhale, raising your arms above your head. Now exhale, reaching for your toes, ankles, or calves. Bending your knees if necessary, gently press the crown of your head towards your toes as you breathe deeply. Surrender to the breath.
Benefits
- Lengthens, tones, and flexes the spine
- Relieves constipation and promotes digestion
- Regulates blood sugar levels
- Tones the kidneys
Contraindications
- Pregnancy
- Diarrhea
- Abdominal surgeries
Cobra: Bhujangasana (boo-jang-ahs-ahna)
Begin by lying on your stomach with your thighs parallel to each other. Firm your leg and thigh muscles as you extend your legs so that your toes push away from you towards the wall. As you inhale, place your elbows under your shoulders and your forearms on the floor. Exhale, using your chest muscles and back to lift your torso, without overextending, by pushing off with your hands.
Focus on rolling your outer thighs towards the floor, which lengthens your lower back and prevents it from being overly stressed. Stay in cobra for a few seconds, breathing deeply, and then slowly lower your chest to the floor. You can gradually increase to ten seconds. Turn your head to one side and take a few more breaths, feeling your back release and broaden. Repeat two to seven times.
Benefits
- Limbers the spine
- Strengthens muscles of the back, abdomen, and entire upper body
- Relieves gas and constipation
- Counteracts long hours sitting at a desk
Contraindications
- Hernia
- Peptic ulcers
- Pregnancy
Side Angle: Utthita Parsvakonasana (oo-TEE-tah parsh-vah-cone-AHS-anna)
Stand with your feet about three feet apart, turning your left foot slightly to the right and your right foot out to the right at 90 degrees. Raise your arms and reach them out to the sides, parallel to the floor, with the palms pointing down.
Anchor your left heel to the floor and firm your thighs, rolling your right thigh out. Breathe in, and as you exhale bend your right knee over the right ankle, so that the shin is perpendicular to the floor. Bend as far as is comfortable for you, bringing the right thigh as parallel to the floor as is right for your body. You can place your right hand along your calf or just outside your right foot, depending on your flexibility. You can also rest your right forearm on the top of the right thigh or place a block outside the front foot to support your hand.
Extend your left arm straight up toward the sky, and with a deep inhalation reach your left arm over the back of your left ear, with the palm facing down. Feel the stretch from your left heel through your left fingertips as you extend the entire left side of your body. Keep your gaze on your left hand (unless you have neck injuries) and focus on creating as much length on your right side as you have on the left side.
Hold the post for 10 to 30 seconds and come up on the inhale, pressing both heels into the floor, sweeping your left arm towards the sky. Reverse the position of your feet and repeat the sequence for the left side, holding the pose for the same length of time.
Benefits
- Strengthens and stretches the legs, knees, and ankles
- Promotes flexibility of the spine, chest, groin, and shoulders
- Stimulates digestion
Contraindications
- Severe neck injuries
- Insomnia
- Headache
Seated Spinal Twist: Matsyendrasana (MOT-see-en-DRAHS-ahna)
Sit on the floor with your legs out in front of you. Cross your bent left leg over your right thigh, placing your left foot on the floor. Place your right arm on the outside of your left knee and hold your right knee, while twisting your spine to the left. Hold this position, breathing easily. With every exhalation, allow yourself to surrender into the pose.
Return to the midline and repeat the posture on the other side by crossing your right leg over your left thigh, placing your right foot on the floor. Place your left arm on the outside of your right knee and hold your left knee, while twisting your spine to the right. Again, breathe easily into the pose, using your breath to increase your flexibility. As you become more flexible, reach around and grasp the ankle of the foot that is placed on the floor. Hold for ten seconds, then return to center.
Close your eyes for a few moments and put your attention on your spine. Envision the life force flowing up from the base of your spine, through your pelvis, into your abdomen, up through your heart, through your throat, between your eyes, and into your head. Imagine the thousand-petaled lotus flower at your crown chakra opening. Activate the intention to live your life from a more expanded state of awareness as a result of energy flowing freely through your body.
Benefits
- Lengthens the spine
- Massages and strengthens liver and kidneys
- Stretches out chest and shoulder
Contraindications
- Herniated discs
Poses for Knees and Hips
The following poses help stabilize the joints and strengthen the muscles around the knee and hip joints.Triangle Pose: Trikonasana (trik-cone-AHS-ahna)
Bring your legs apart so your feet are wider than your shoulders. Raise both arms out to the side up to shoulder height so that they are parallel to the floor, palms turned down. Turn your left foot 90 degrees outward, keeping both hips facing forward. Turn your right foot slightly towards the left foot and keep the hips forward as if you have headlights coming from your hips, shining straight ahead.
Press your hips to the right and place your left hand on your thigh above your knee. Bring your right arm up so it is straight with fingertips toward the sky. Make sure to keep your body level as if you are between two glass window panes.
Hold pose for five or six breaths. Gradually return to an upright position, with your arms extended out to the sides, palms turned down. Pause for a moment. Repeat on the other side.
Modified Triangle: 5-Pointed Star
Stand with your legs apart. Keep both feet toes slightly turned out to side. Extend arms out to side. Take a breath in. When you exhale, place your left hand on the outside of your left thigh. The right arm extends up toward sky. Inhale, coming back to 5-pointed star, then exhale on the other side. Repeat 4 to 6 times.Benefits
- Strengthens legs
- Stretches inner thighs
- Improves digestion and elimination
- Stimulates the abdominal organs
Contraindications
- Helps relieve the symptoms of menopause
- Knee injury
- Neck injury
- Herniated disks
Eagle Pose: Garudasana (gah-rue-DAHS-ahna)
For most people the eagle pose is challenging on their first attempt; however, this pose can usually be mastered within a short period of time. It is helpful to do eagle arms and eagle legs separately for the first few times.
Arms
Extend your arms out to the side. Bend your left elbow in front of your body, fingertips up toward the sky and cross your right arm between your left arm and chest. Place the fingers of your right hand onto the palm of the left and point your fingertips to the ceiling. Gently press your elbows together. Hold this pose for ten seconds and then unwind.Legs
Standing with your feet together, bend both knees, then shift your weight to your left foot. Raise your right leg, keeping both knees bent and then cross your right leg around the front of your left leg until you can hook your toes around your left calf muscle near the ankle. You will need to keep your left knee bent to achieve this. Repeat this balancing posture on the opposite side.*When doing full Eagle, do the arms first and then follow instructions for legs.
Benefits
- Strengthens and stretches the ankles and calves
- Stretches the thighs, hips, shoulders & upper back
- Energizes and clears the lymph system
- Improves concentration
- Improves balance
Contraindications
- Knee injuries
- Ankle injuries
- Shoulder injuries
Warrior 2: Virabhadrasana II (veer-ah-bah-DRAHS-anna)
Stand with your legs three to four feet apart and turn your right foot in slightly to the right, and your left foot 90 degrees to the left. Align your left heel with your right heel. Expand your arms out stretching them parallel to the floor, with your palms facing down.
As you exhale, bend your left knee, bringing your left thigh as parallel to the floor as is comfortable for you. Keep expanding your arms away from your body keeping the torso long and the shoulders centered over your pelvis. Press your outer right heel into the floor and focus on firming the right leg as you bend the left knee. Don’t allow your back to “sway” out; instead, keep the tailbone tilted slightly towards the pelvis. Stay in this position for five deep breaths. Come up on the inhale, reverse your feet, and repeat on the other side.
Benefits
- Strengthens the legs and knee muscles
- Stretches the shoulder and chest muscles
- Increases groin flexibility
- Improves concentration
- Improves balance
Contraindications
- Knee injuries
- Ankle injuries
- Shoulder injuries
Additional Guidance for All the Poses
- It’s important not to hyperextend the knees in any pose, and be sure the knees and feet are in line. In standing poses, the feet should be firmly planted and toes spread apart.
- Some squatting, kneeling or one-legged poses may not be appropriate for certain people with arthritis in the knees, hips and ankles. Discuss this with your yoga instructor.
- If a muscle starts to feel fatigued, don’t push it; just rest in corpse pose (savasana), lying comfortably on your back with your legs and arms slightly out.
- It is recommended that people with OA move through poses slowly, rather than holding one for a long period of time.
References
- The Cochrane Collaboration; Cochrane Reviews. www.cochrane.org. Exercise for Osteoarthritis of the Knee. Accessed October 2010.
- Garfinkel, M. Yoga as a Complementary Therapy. Geriatrics and Aging. 2006; 9(3)190-4.
- Garfinkel, MS, et al. Evaluation of a Yoga-based Regimen for Treatment of Osteoarthritis of the Hands. Journal of Rheumatology.1994; 21(12):2341-3.
- Haapala, J, et al. Decline After the Immobilization and Recovery after Remobilization of Synovial Fluid. Ann Rheum Dis. 2001; 60(1):55-60.
- Kolasinski, SL; Garfinkel, MS; et al. Iyengar Yoga for Treating Symptoms of Osteoarthritis of the Knees: A Pilot Study. J Altern Complement Med. 2005;11(4):689-93.
- Mishra, L. Scientific Basis for Ayurvedic Therapies. CRC Press. 2004.
- Garfinkel M; Schumacher, HR. Yoga. In Panush RS, (ed.) Rheumatic Disease Clinics of North America: Complementary and Alternative Therapies for Rheumatic Diseases II. Philadelphia, PA: W.B. Saunders Co., 2000: 125-32.
- Wood C. Mood Change and Perceptions of Vitality: A Comparison of the Effects of Relaxation, Visualization and Yoga. J R Soc Med; 1993;86(5):254-8.
- Yoga Research and Education. Accessed Oct 2010.