Have you ever been to a yoga class and the teacher demonstrates a perfect balancing pose that looks so easy and simple. Yet when you try it—bam! You meet the floor.
Trying a new yoga pose in class can be scary and intimidating, especially if failure means falling flat on your face. Yoga is not about being perfect. It’s about challenging yourself—knowing that even as you wobble or flop to the ground, every great master has fallen many more times than you have tried.
The same lesson exists in life; the only way to grow is to make mistakes, forgive yourself, and learn along the way. When you give yourself permission to make mistakes, it gives everyone else permission to do the same. If you’re ready to challenge yourself and take some risks, try these five yoga poses. You’ll improve—even as you fall—and you might even have some fun.
Warm up your body with a series of sun salutations before you begin. You may also want to prepare some comfortable blankets or pillows around you for a softer falling spot.
Drop your tailbone so that it’s angled toward your toes, this will engage the lower energetic locks known as Bandhas.
Once you feel stable, bring your arms into prayer position in front of your heart, or raise them to the sky. Now comes the challenge: See how long you can close your eyes. Start by closing one eye first. Once you feel comfortable, try closing both eyes. You will probably wobble; try to enjoy the dance. Take five breaths while in this pose and then return the right foot down. Follow with the left side.
If you need to extend the opposite hand for balance, take care not to strain the lower back as your torso moves forward. Pull the shoulders down as you arc into the pose. Stabilize the body on the standing leg, and hold the pose for 30 seconds or longer. To release the pose, exhale, and bring the leg down slowly. Center yourself in Mountain Pose, and then repeat on the other side.
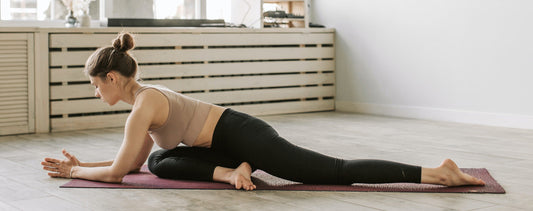
Drop your torso slightly forward and press your elbows along the inside of your knees and bring your palms together in prayer position. Bring your palms to the mat, keeping them about shoulder-distance apart. Spread your fingers and press evenly across both palms and through your knuckles. Press your shins against the back of your upper arms. Draw your knees in as close to your underarms as possible.
Lift onto the balls of your feet as you lean forward. Round your back and draw your abdominal muscles in firmly. Look at the floor between your hands or at a point even more forward, if possible. As you continue to lean forward, lift your feet off the floor, and draw your heels toward your buttocks. Balance your torso and legs on the back of your upper arms. Keep pressing evenly across your palms and fingers, and then begin to straighten your elbows. Keep your knees and shins hugging in tightly toward your armpits. Keep your forearms drawn firmly toward the midline of your body. Touch your big toes together. Draw your belly in. Breathe steadily. Hold the pose for up to one minute. To release, exhale as you slowly lower your feet to the floor.
Start by placing your hands and knees on the mat. Lower the top of your head to the floor so it's in front of your hands, just as if you were about to do Sirsasana II or Tripod Headstand Pose. Then walk your hands out to the sides of your head, keeping your elbows bent slightly, as shown in the photo to the right. Once your head and hands feel stable, straighten both legs, and walk your feet as close as you can towards your head. Shift your hips over your shoulders and use your abs to lift both legs up into the air, or gently kick them up. Keep your legs together and point your toes.
Now here's the tough part. Walk your hands so your arms are straight and your head is in the middle. Hold this pose for five deep breaths. Then slowly lower your feet to the floor.
Keep your knees soft and do not squeeze your legs. Once your legs are placed in Padmasana, bring your buttocks and navel toward the centerline of your body and gently press your knees outward to create a lengthened spine. Hold this position for about one minute. Upon releasing, slowly return to the starting position.
By practicing these balancing poses, you’ll start to see improvements on and off the mat in your general balance, posture, and coordination as well as a more alert mind. Keep trying and let that silly wobble inform you that you are just moments away from success.
Trying a new yoga pose in class can be scary and intimidating, especially if failure means falling flat on your face. Yoga is not about being perfect. It’s about challenging yourself—knowing that even as you wobble or flop to the ground, every great master has fallen many more times than you have tried.
The same lesson exists in life; the only way to grow is to make mistakes, forgive yourself, and learn along the way. When you give yourself permission to make mistakes, it gives everyone else permission to do the same. If you’re ready to challenge yourself and take some risks, try these five yoga poses. You’ll improve—even as you fall—and you might even have some fun.
Warm up your body with a series of sun salutations before you begin. You may also want to prepare some comfortable blankets or pillows around you for a softer falling spot.
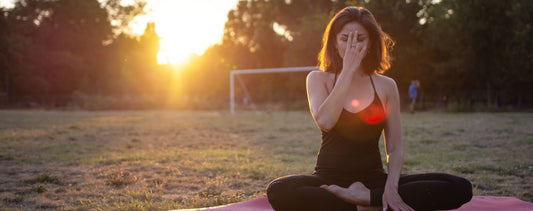
Vrksasana (Tree Pose with Eyes Closed)
Stand with your feet hip-width apart. Ground all four corners of the left foot into the floor. Take your right foot and place the sole on your upper inner thigh above your kneecap. If this is too difficult, place your foot below the knee. Never place it directly on the knee. The toes of your raised foot should be facing the ground.Drop your tailbone so that it’s angled toward your toes, this will engage the lower energetic locks known as Bandhas.
Once you feel stable, bring your arms into prayer position in front of your heart, or raise them to the sky. Now comes the challenge: See how long you can close your eyes. Start by closing one eye first. Once you feel comfortable, try closing both eyes. You will probably wobble; try to enjoy the dance. Take five breaths while in this pose and then return the right foot down. Follow with the left side.
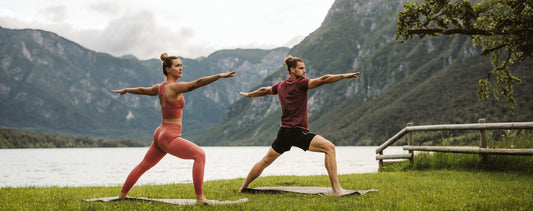
Natarajasana (Lord of the Dance Pose)
Speaking of dance, this next pose will have you looking like a ballerina. Begin in Tadasana (Mountain Pose), which is used as a starting point for many other poses. Activate your right foot. As you exhale, bring your left leg back toward your buttocks with your left hand. Make sure your navel is drawn inward as you move the tailbone down. Keep your torso straight and upright.If you need to extend the opposite hand for balance, take care not to strain the lower back as your torso moves forward. Pull the shoulders down as you arc into the pose. Stabilize the body on the standing leg, and hold the pose for 30 seconds or longer. To release the pose, exhale, and bring the leg down slowly. Center yourself in Mountain Pose, and then repeat on the other side.
Bakasana (Crow Pose)
Begin by standing at the top of your mat in Mountain Pose with your arms at your sides. Step your feet about as wide as the short edge of your mat. Bend your knees, lower your hips, and come into a squat. Separate your thighs so they are slightly wider than your torso, but keep your feet as close together as possible.Drop your torso slightly forward and press your elbows along the inside of your knees and bring your palms together in prayer position. Bring your palms to the mat, keeping them about shoulder-distance apart. Spread your fingers and press evenly across both palms and through your knuckles. Press your shins against the back of your upper arms. Draw your knees in as close to your underarms as possible.
Lift onto the balls of your feet as you lean forward. Round your back and draw your abdominal muscles in firmly. Look at the floor between your hands or at a point even more forward, if possible. As you continue to lean forward, lift your feet off the floor, and draw your heels toward your buttocks. Balance your torso and legs on the back of your upper arms. Keep pressing evenly across your palms and fingers, and then begin to straighten your elbows. Keep your knees and shins hugging in tightly toward your armpits. Keep your forearms drawn firmly toward the midline of your body. Touch your big toes together. Draw your belly in. Breathe steadily. Hold the pose for up to one minute. To release, exhale as you slowly lower your feet to the floor.
Mukta Hasta Sirsasana C (Iron Cross Headstand Pose)
This is an advanced headstand, great to challenge those who have already mastered a traditional headstand in the middle of the room. You may want your teacher to help you if trying this for the first time.Start by placing your hands and knees on the mat. Lower the top of your head to the floor so it's in front of your hands, just as if you were about to do Sirsasana II or Tripod Headstand Pose. Then walk your hands out to the sides of your head, keeping your elbows bent slightly, as shown in the photo to the right. Once your head and hands feel stable, straighten both legs, and walk your feet as close as you can towards your head. Shift your hips over your shoulders and use your abs to lift both legs up into the air, or gently kick them up. Keep your legs together and point your toes.
Now here's the tough part. Walk your hands so your arms are straight and your head is in the middle. Hold this pose for five deep breaths. Then slowly lower your feet to the floor.
Padma Sarvangasana (Lotus in Shoulder-Stand Pose)
Lie on your back. Come into Sarvangasana (Shoulder Stand Pose) and support your back with both hands evenly on either side of the spine. Bend your right knee and draw the heel of the right foot into the inner thigh of the left as you start to bring your legs into Padmasana (Lotus Pose). Next, bend your left knee along the centerline until the left foot is under the right shin. Then bring your left knee slightly out to the side, while keeping the knee joint closed. Gently lift the left foot toward the right hip crease.Keep your knees soft and do not squeeze your legs. Once your legs are placed in Padmasana, bring your buttocks and navel toward the centerline of your body and gently press your knees outward to create a lengthened spine. Hold this position for about one minute. Upon releasing, slowly return to the starting position.
By practicing these balancing poses, you’ll start to see improvements on and off the mat in your general balance, posture, and coordination as well as a more alert mind. Keep trying and let that silly wobble inform you that you are just moments away from success.